With the release of iOS 11.3 a couple weeks ago, along with other updates, some nice improvements and features came to ARKit. Vertical place detection, better detection of oddly geometrically shaped objects, and ARReferenceImage. Today we’ll be taking a look at that last one, and how we can build an app to utilise it.

Essentially, ARReferenceImage allows us to provide ARKit with images and an estimation of how big they are, and then we get a callback when one of these images is detection. Each image can be given a name, and we can use this name to figure out which image was detected. The images can either be bundled with the app in the Assets catalog, or can be downloaded from an API and passed into an initialiser for it if you want them built at runtime instead (or you want to be able to add images without updating the app).
First let’s look at getting the app detecting images, and then implement a UI in AR world by using UIKit and a little bit (not too much) of SceneKit.
Note – you’ll need a phone capable of ARKit world detection on iOS 11.3 and Xcode 9.3
Let’s start by just making a single view app in the normal way – don’t select to make an AR app. In the storyboard, drag out an ARSCNView, or AR Scene Kit View. Add constraint to fill the superview and make an outlet to it called sceneView. Now in viewDidLoad, we set ourselves as its delegate and instantiate its scene.


Now to grab those reference images. First, head over to your assets catalog, right click and select New AR Resource Group. Give it a name – I called mine AR Resources. In here you put pictures of objects you want recognised, and a name and size. Since everything in AR world is in meters, you can change the measurement unit to be meters for consistency. The size should be as accurate as you can make it. Note that Xcode will adjust either width or height to make it fit the aspect ratio of the image you provide it with.
Once you’ve got your pictures in there and they’re set up (name and size), head back to your code. Override viewDidAppear, which is where we’ll run a WorldTrackingConfig on our sceneView’s session object and initialise our reference images.

One last thing – make sure in viewDidDisappear you pause the session. ARKit relies on both camera information and gyroscopic and accelerator data to work, and when the view is disappeared, that data can’t be accessed. So we want to cancel the session and remake it when the view appears again – resetting the tracking.

You should have an error at this point, where we set the delegate of the sceneView to ourselves. We need to conform to the delegate. Create an extension on your UIViewController and conform to ARSCNViewDelegate. Here we need to implement
func renderer(_ renderer: SCNSceneRenderer, didAdd node: SCNNode, for anchor: ARAnchor)
This function gets called each time ARKit recognises one of the reference images we supplied it with. You can use the anchor here to get the name of the picture that it recognised. We need to capture the current frame and the name of the image.

Now we have the name of the image we can do whatever we want! We can use it to make a network request to get additional details about the object, or match it up with a dictionary to get the details that way. I’m gonna do the second way for this example. So I’ll define a dictionary of [String: ImageDetails], where ImageDetails is just a struct with a title and description string properties. Now to get the details of the image, I can just use let details = hashMap[imageName].

Now finally, we just need to fill in that addNode function. All this will do is add a SceneKit box to the AR view at the position that the reference image was seen.
The great thing about ARKit in iOS 11.3 is that we can use normal UIView objects and place those in the AR world. So I’ve gone ahead and made a xib file and an associated swift class for it, which just has a title and description.

Note – Displayable here is just my ImageDetails struct
Now we’ve got our UIView. Let’s add it. First we’re gonna create an SCNBox node, and then we’ll add this UIView as the firstMaterial property. This is Any?, and whatever we give it will be used to cover the first side of the box. Then for the rest of the sides of the box we can just make them dark grey.

We’re diving by 3000 here because the frame.width and .height of the UIView when converted to meters (which is what ARKit uses) is massive, so we’re just scaling it down to a sane size. The length is how deep the box is. So now we have an SCNBox. SCNBox is a subclass of SCNGeometry. We now need to create an SCNNode, and initialise it with our box.

It’s called child because this will be added as a child node of the node where our image was detected. Now we have to transform this node so that it’s the right way around. We need to modify the euler angles x and y property, so we spin it around. If we didn’t do this, the box would be flipped horizontally and vertically.

The other transform we’ll do is to position the child node in the bottom right corner of the parent node, and bring it forward toward the user just a bit, so it’s in front of the parent node.

Almost there! The final step is to add this new node as a child of our parent node. Add the following line, and you should be able to detect images that you’ve bundled in your asset catalog and see them appear.

If you’re brand new to ARKit, this might seem a little overwhelming. But I want to bring two things to your attention. First – we’re manipulating objects in 3D space, and look just how little math we’re using. This, I think, really shows how fantastic the ARKit API is. Second – we’re actually creating our views mainly with UIKit. That ARInfoView I have up there is just a plain old UIView. It has a tap gesture recogniser on it, which calls a block when triggered. So say if the user taps on this UIView in AR, I just have to set that block. Like this.
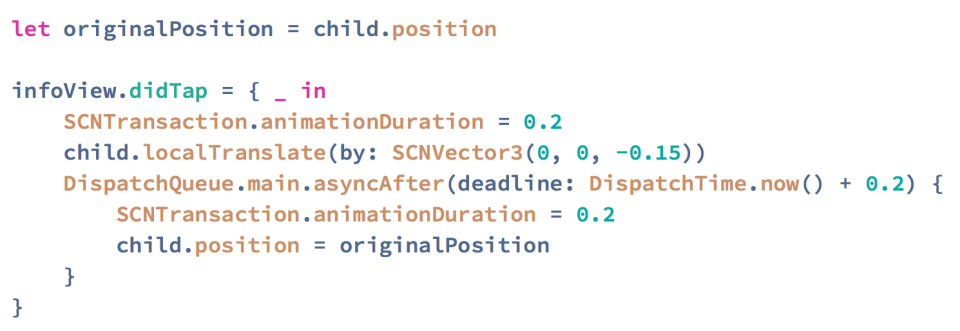
Here I’m capturing the original position after it’s been translated, then in the didTap block, I animate the whole box so it’s translated away from the user in the z axis, and then comes back to its original position after 0.2 seconds. But you can do anything you want. We could use that block to bring up a normal UIViewController, or a SafariViewController if they want to browse it on Amazon. You can even add an SCNVideoNode that plays the trailer to a film in front of a movie poster when it’s detected.
I don’t think AR will take off just yet – I think we need to get rid of holding something for that to happen. But hopefully some cool stuff comes out of this.
